Setup Hashicorp’s Nomad And Consul Using Ansible
There’s something beautiful about Hashicorp products and the way they operate. Clean, elegant and simple. I’ve been using Hashicorp’s Nomad and Consul for most of our internal use cases and I’d advocate for its use if you have the team to support it.
This walk-through will provide you with the information required to run and manage your Nomad Cluster. We’ll briefly touch upon Consul to ensure you’re able to seamlessly load balance your services. We’ll use Consul for it’s service discovery features to fetch registered service IPs.

How we use it
Most of our internal systems run on an on-premise server or on Digital Ocean running Ubuntu Server 22.04. We use KVM (virtmanager) to create VMs which are then used for deploying Nomad, Consul, PostgreSQL and Redis. We use Ansible to set up most of our environments.
In this post we’ll assume we have a bunch of virtual machines already setup. If you’re looking to set up a home lab we recommend you check out the post on setting up Bridge Networks with KVM
Installing Nomad With Ansible
We’ll use two playbooks, one for the nomad servers and one for nomad clients. We’ll set up a 5-node cluster with 3 server nodes and 2 client nodes for this post.
The folder structure for the ansible role appears fairly standard. We have the nomad_server.hcl.j2 configuration file which stores the actual server configuration. We’ll dynamically build these configurations for each of our hosts.
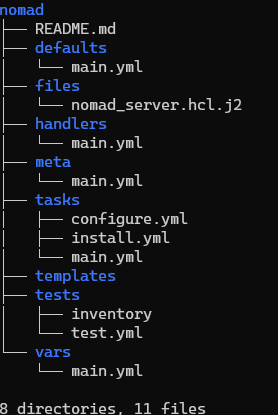
We maintain 2 separate tasks for installing and configuring each node under the tasks folder. Let’s look at our each of these files next.
We use the standard structure that ansible-galaxy init roles/nomad --offline offers. This generates a nomad role for us.
The vars
The cluster_ips specify the ip addresses of the nodes that are going to part of this cluster.
Note
The extra space in front of the cluster_ips is intentional and it ensures the interpolation does not force single quotes on the configuration files placed on the server.
The inventory
We use vms 1, 3, and 4 as servers and, 6 and 7 as clients.
The roles/nomad/tasks/install.yml
The install script is fairly self explanatory but to summarize the operations:
We install
aptand some system dependencies in theInstall aptitudeandInstall System Packagessteps.We fetch the GPG key and use the new approach where we store it in the
/etc/apt/keyringsfolder instead of the/usr/share/keyringsfolder, in theascformat to avoid the additional step of de-armoring which was customary with older versions.We then add the repository using the key we just added.
We run an
apt updateWe then install the
nomadpackage and the python libraries for nomad.
That’s pretty much it
The roles/nomad/tasks/configure.yml
We then configure the server by uploading the interpolated HCL file under /etc/nomad.d/nomad.hcl and restart the service.
The roles/nomad/tasks/main.yml
We simply import our tasks into main
The Server Configurations
Our Nomad server configurations are largely the defaults.
We dynamically import the node name into the HCL file.
The
bind,advertiseandportslargely stick to the defaults. We simply interpolate the IP of the host in consideration into each of these files.For this example we use a non-tls cluster. However, you may choose to use TLS for a production cluster along with [ACLs](https://developer.hashicorp.com/nomad/tutorials/access-control/access-control) which we don’t cover in this post.
The
gossipsecret is optional and generated using
$ nomad operator gossip keyring generateSince we need 3 nodes in our cluster we bootstrap them with the server configuration called
bootstrap_expect=3And we specify the values for the
cluster_ipsFor this example we using a single node Consul server. Ideally, we’d want a Consul cluster but since we use this largely to enable load balancing of our nodes, we’re going to stick with a single Consul node.
We enable the
check_use_advertiseto tell Consul to use theadvertiseaddresses for all healthchecks.
With that out of the way we’re ready to create our playbook file nomad-server-playbook.yml
Deploy And Check If Our Server Are Up From Our Jump Box
We deploy our nomad server cluster using
$ ansible-playbook nomad-server-playbook.yml --tags install-nomad
$ ansible-playbook nomad-server-playbook.yml --tags configure
Client Servers
Our clients setup is identical to that of the server except for our clients configuration file.
Deploy Clients
$ ansible-playbook nomad-client-playbook.yml --tags install-nomad-clients
$ ansible-playbook nomad-server-playbook.yml --tags configure-clients
Let’s quickly check our clients
Our Nomad UI is active now and should display our clients and servers as well on port [http://10.0.0.19:4646/]
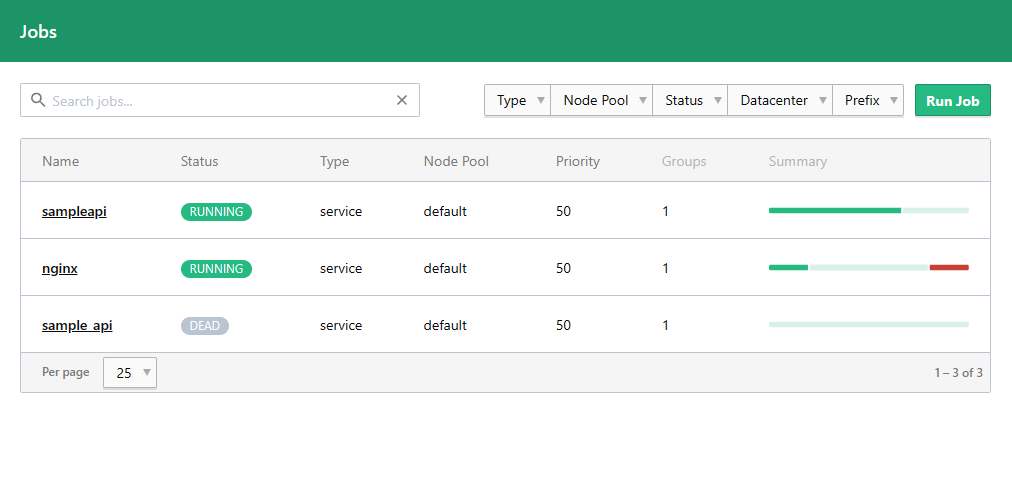
Deploying Services
We’re going to deploy a basic HTTP service and load balanced it with Nginx. We’ll deploy 4 instances of the service using the sample_api.nomad.
We’ll use the dynamic port configurations to that nomad offers for this example.
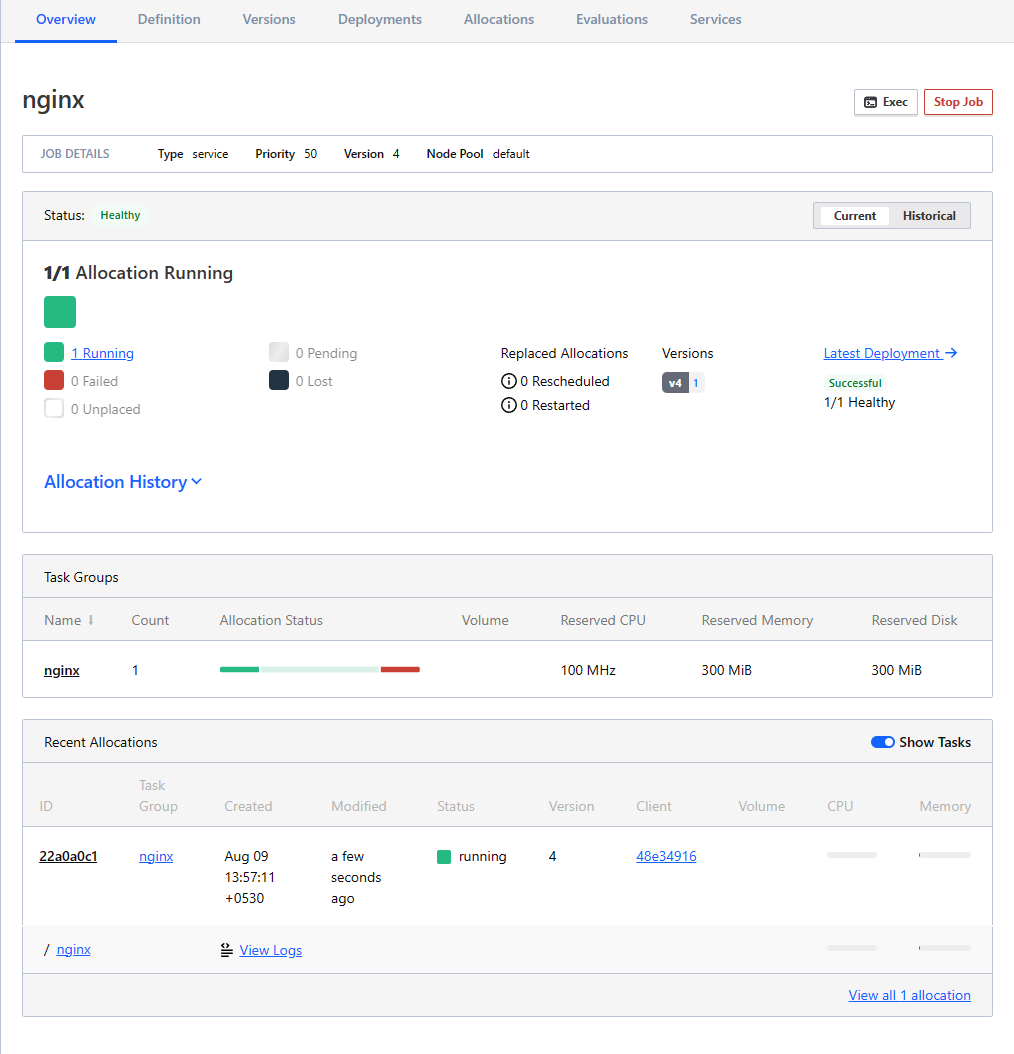
We’ll also go over our Nginx configuration file nginx.nomad
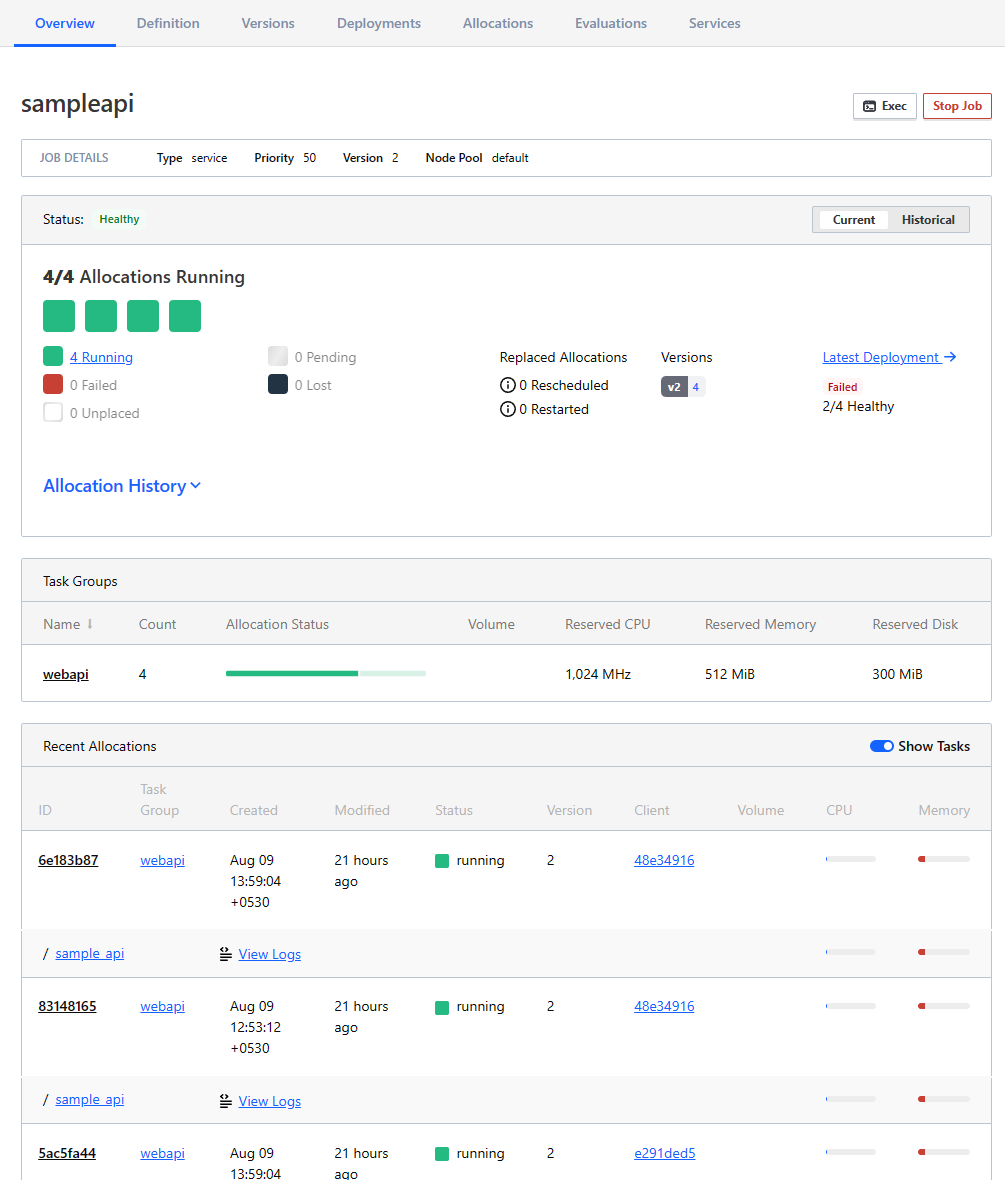
The only noteworthy lines here is the template block which dynamically fetches the services registered on Consul with their host and port to set the upstream servers for Nginx to proxy_pass the requests to. When our sampleapi services is deployed it registers itself with Consul. This is visible on the Consul UI under services.
Deploy Our Jobs
And now, we have our platform ready for use.